blue samba.

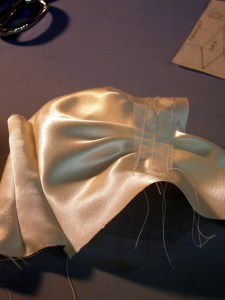
I tried twice to get the right color for the detail embroidery on the turquoise/ivory gown. I use Kreinik braid, which is difficult to find. Searching online became my best solution. I found a splendid online store called 123stitch.com where I was able to find all the possible Kreinik floss in a myriad of colors.

When I received the first order, the color was not quite right. Ever since I started Doll Fancier, my goal to provide top quality in all that I do guides my choices. So, back to the color chart and another order. The second trial proved a charm! O, yes!  Kreinik named this one “Blue Samba” and it sparkles. More importantly, it matches the color of the lace.

close-up of new embroidery

The project moves another step closer to completion. And I do a happy dance, right here in the studio.

xo, Nancy

progress. in pictures.

There is a sense of traveling downhill now, a sense of really actually possibly reaching my goal. I look at the partly completed gown with its pleated bodice, its 3/4 circle skirt draping just so, and the beginnings of an embroidered over-skirt at the doll’s feet, and I smile.photo of partly completed gown

The over-skirt, with its lace medallions, pinned pleats, and sparkling beads hint at completion.

photo of the lace medalions on overskirt

There is still work to be done. But the possibility of completing a project that almost undid me lifts my spirits. I no longer feel the frustration, the loss, the self-doubt. All of that has been replaced with beautiful joy that accompanies getting to do the work and recognizing the power in the process.

photo of the items I use to embroider the designs on the overskirt

thank you, dear reader, for joining me on my adventure.

xo, Nancy

what i know of patience

this ivory and turquoise ball gown project spans years. it started with a phone call and an exchange of photos.

gifts of friendship, patience, acceptance, perseverance, creativity followed.

at times I have concluded that bringing about a quarter-scale replica of my client’s ball gown required skills beyond my reach.

and yet, here i am. I have a client who believes in me. I have friends who believe in me. Who am I to doubt when I am standing in the light of all that love?

what I know of patience is the absence of shame in moments of quiet waiting, the willingness to listen for answers when my ego wants me to believe I have failed.

I visited Britex in San Francisco again on Monday. I tendered my request for help by offering a swatch of fabric in my outstretched hand. My assistant found beaded lace in the exact color and design needed to re-create the appliques on the overskirt of the gown.ImageLeft: original ball gown ~ Right: the new lace on top of the fabric for the replica.

to create the look of the original, I’ll separate out flowers and leaves from the lace and apply them onto the skirt, like they did on the original gown. Then, I’ll add embroidery above and below those appliques to make them look like the designs on the original.

my true and overarching lesson from all of this may yet come but for now I’m aware of not questioning how long the project is taking. I can say this only when accompanied by a great big thank you to my client who has exhibited an abundance of patience!

xo, Nancy

atrasado. behind schedule.

In my last post, inching forward, I spoke about being brave. That was a month ago. Unexpectedly, I was interrupted for an entire week after one of the kitties at the animal shelter where I volunteer bit me. For all concerned, it was an unhappy situation. My friend reminds me that thank goodness the cat didn’t bite a child. My prayer, to be guided and protected, was answered. I have recovered and am back to work. But I am behind schedule.

photo of bodice on model

The bodice, with new sleeves that I must admit I LOVE, finally has the shape I want. People close to this project know how long success with this eluded me. The embroidery to come will alter it a bit. However, the embroidery enhances the bodice, it does not make the bodice.

Now my focus turns to the overskirt. Aye, there’s the rub! Picture this: I have a pattern for the underskirt (done in turquoise goods) and I must cut it apart to only put it back together in an entirely NEW shape.

photo of skirt progress on model
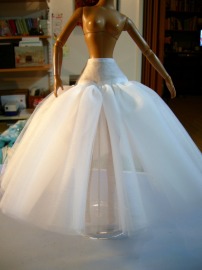
But it is a beginning. And beginnings are good.

I make a start. My pace slows when my mind struggles with the undoing and the redoing. I tell myself, Keep going. Take breaks. Love the process. And notice, once in a while, from whence you’ve come. Progress!

xo, Nancy

inching forward.

photo of bodice on model 1The bodice, basted and taped (yes, taped with Scotch tape to hold the pleats), with sleeves….

On Friday, I stitched it together and then ran away. Literally! I couldn’t look. I set the little bunch of fabric that was now a bodice with sleeves on the ironing board, turned off the light, and left the studio.

Would it fit? Or would I have to start over? 

All over. Again.


close-up photo of bodice on model

Today I am feeling brave. I adjust the layers and try the bodice on my model.

Yes, there are problems. I have to undo the basting for the sleeves and reset the yoke. I should adjust the fit along the right side. But I can take each step as it comes. That is not as overwhelming as starting over.

So, I am inching forward. Bit by bit. Pleat by pleat. Stitch by stitch.

xo, Nancy

life. in pleats.

photo of pattern drafting with pencil and rulerOn to the bodice. I need to find the best way to re-create the pleats in this gown, first in the bodice, and, later, in the skirt. I have traveled this path before. And I gave up. I want to give up again because I keep trying and the solution is just not coming. Draft. Fit. Redraw. Fit. Take a break. Rework. Consider. Think.

Instead of sewing in little spaces of time that present themselves, I turn my attention to finding a pet sitter for Chloë and rearranging all the files in my office. I watch hair styling tutorials on YouTube.

Now it has been several days since I had the fabric in my hands. Resistance is strong, trying to win.

So, before I start work today I do two things. I procrastinate. And then I call a couple of friends who understand. I announce to them that Resistance will not win. Not today.

I set aside drafting and move on to draping the bodice fabric. If I could cross my fingers, I would. But that makes it really hard to sew.

Finally, progress!

And a text from a friend: “Sloth doesn’t sound as elegant as procrastination. Just saying…”

O, dear. So true! I just want everything to fall into place. Pleats as a metaphor for life! Things don’t just fall into place, not without action. I’m grateful I fought resistance and sloth last week and made a phone call. I love our new pet sitter! The files are another story. But my husband says my hair looks great and I actually made some progress today with my sewing project. Without action, there could be no progress, however slight. Just saying…

xo, Nancy

photo of under bodice

photo of fabric draped on model


another photo of draping fabric on model

photo of draped and basted bodice


photo of front and back bodice pieces ready to sew

what matters most.

I continue to devote myself to recreating the fancy ball gown. When I am not in the studio, I am thinking about it. On BART, San Francisco’s Bay Area Rapid Transit system, I pull out my tablet and read The War of Art. In Book Three, Beyond Resistance, Steven Pressfield stresses professionalism. He describes the qualities to bring to my work that Resistance will not be able to overcome. And then he says the one thing that keeps me going back to the studio: “Because the most important thing about art is to work. Nothing else matters except sitting down every day and trying.”

So, I re-enter the studio, armed with a knowing smile. For the time being, I will devote myself to just the underskirt. Here is a peek at my process.

photo of fabric on ironing board 
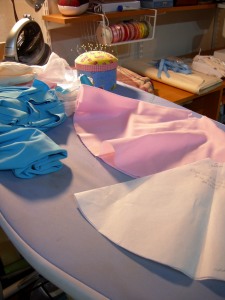
1. Draft the pattern.
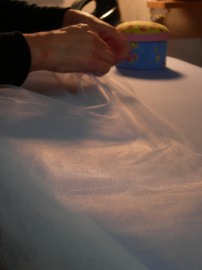
2. Cut out the pattern.

photo of paper pattern

photo of prototype on model

3. Cut out and fit the prototype.

4. Review the underpinnings.

photo of model in petticoat and bodice

photo of pattern with hand-written notes

5. Re-draft the pattern.

6. Adjust the prototype.

7. Wait overnight for fabric to settle.

photo of paper pattern with scissors on drafting board

8. Check the length. (too long.)

DSCN2486


9. Adjust the pattern.

photo of pinning pattern to fabric

photo of cutting out the prototype


11. Let the whole thing settle again.

12. Start thinking about the next step.photo of prototype on model

xo, Nancy

ballerina. priceless.

tiny ballerina before

A friend of mine asked if I could sew a very, very tiny skirt. Her question led to a new project. Her friend needed someone to provide TLC for a precious ballerina music box. Thus ensued a grand adventure of learning and problem-solving.

photo of vintage ballerina music box

For a music box that may have been around since the 1940s, it looks really good and I feel honored to have been invited to help with its renewal.

  • Replacement ballerina from a music box found on eBay
  • Replacement fabric for the stage from Britex Fabrics in San Francisco
  • Replacement paper flowers from my very own collection of trims

My client’s reaction when she saw the finished piece? Priceless.

I created this video, tiny ballerina, to share the story from beginning to end in 30 seconds. (The time frame for this project was much longer. I encountered Resistance, especially when it came to taking the music box apart. A clever friend helped me with that part of the project, right in the middle of his work day.)

The part of the story that is so wonderful is this: Once again I am made aware of how Angels arrive in my life to help me through fear and resistance and feeling unsure and I rejoice!

xo, Nancy

(You can make a video of your own at Animoto)


one little petticoat

photo of tulle layers basted together

It has been a month since I last spoke about the woes of tulle.

To add to my woes, lurking self-doubt and a wicked sore throat slowed my pace.

photo of doll-size petticoat on work surface

Now I’m happy to say that the plan to baste the layers of tulle together worked! Even with that preparation, the tulle still shifted. Next time, I might cut the pieces of tulle larger to account for the shifting during the process of basting and the required trimming afterward.

With the help of some of my favorite tools ~ in this case the rotary cutter aligned with a T-square ~ I trimmed the tulle. With a nice, even edge, I was able to stitch the tulle to the organdy yoke.

photo of doll-size petticoat

The result pleases me. I’m still reflecting on the delays that hold me back from moving forward with creative projects. Most of all, it is Resistance. I know about it, what brings it up.

I found two books on the subject that are really good. One is Creative Thursday; the other The War of Art. I wish my courage to work through Resistance wouldn’t take quite so long.

Maybe next time.

photo of doll-size petticoat on doll


tulle. and patience.

Alas! the tulle petticoat is still a dream.

DSCN2411

After I had successfully cut the eight layers of tulle to the measurements, I reacquainted myself with the unique properties of this fabric. Exactly what I said last time we visited.

Lighter than air and hard to pin down.

Slippery, with a will of its own.

photo of my hands working with the fabricNearly invisible.

I set about adjusting the layers and pinning them together so that they would lie one on top of the next, like a stack of paper.

Paper would have behaved! This is like stacking spider webs.

I basted the layers together, along one long and one short side by hand. Hmmm! Imagine my excitement! I felt on top of the world! Things were going swimmingly.

(Dost thou sense it? To what dark place is the seamstress headed?)

photo of my hands pulling the gathering threads

I used the longest stitch on my machine and sewed two rows of gathering stitches.

So far, so good. The next step was to pull the threads and reduce the length of one long side to mere inches.

photo of gathered tulle

Almost there. Wait for it!

Ahhhh! The gathering held! Ready to pin and baste the skirt to the yoke (that bit of curved fabric to the right of the skirt).

Nope. With the end in sight, I discovered that success was but a dream.

One of the layers of tulle had evaded the basting thread back in step 1. There was nothing to do but take out the gathering stitches and begin again.

This time I have a new plan for the basting. It will take longer. But that is the way with tulle.

DSCN2421


‘Life is all about how you handle Plan B.’ (Author Unknown)

xo, Nancy